Description
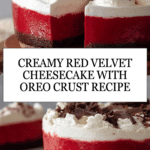
This luscious Red Velvet Cheesecake combines the rich, deep flavors of red velvet and dark chocolate with a smooth, creamy cheesecake filling on a crunchy Oreo cookie crust. The no-bake cheesecake sets perfectly in the fridge for a velvety, indulgent dessert that’s visually stunning thanks to its seductive scarlet hue. Topped with softly whipped cream and dark chocolate shavings, this elegant dessert is perfect for special occasions or anytime you want to impress guests with a visually striking yet simple-to-make sweet treat.
Ingredients
Scale
Oreo Biscuit Base
- 200g (7oz) Oreo cookies (about 1.5 standard packs)
- 60g (4 tbsp) unsalted butter, melted
Red Velvet Cheesecake Filling
- 2 tsp unflavoured gelatine powder
- 2 tbsp water
- 1 cup heavy/thickened cream, fridge cold
- 500g (1 lb) cream cheese, softened (block form)
- 3/4 cup caster sugar / superfine sugar
- 1 tsp vanilla extract
- 150g (5 oz) 70% dark chocolate
- 6 tsp red food colouring
- 1 1/4 cups heavy/thickened cream, fridge cold (for whipping)
- 3 tbsp caster sugar / superfine sugar
- 1 tsp vanilla extract
Decoration (Optional)
- 2 tbsp shaved or grated dark chocolate (for sprinkling)
Instructions
- Prepare the Pan: Flip the base of a 20cm (8″) springform pan upside down to make cheesecake removal easier. Lightly butter the pan base and press a square sheet of baking paper onto it. Clip the pan sides onto the base, allowing excess paper to stick out, then butter and line the sides with more baking paper.
- Make Oreo Biscuit Base: Roughly break Oreos by hand and blitz in a food processor until fine crumbs form. Add melted butter and blitz again to combine. Press the crumb mixture firmly and evenly into the prepared pan base using the flat bottom of a cup or measure.
- Bloom Gelatine: Sprinkle gelatine powder over 2 tbsp water in a small bowl and stir to partially dissolve. Set aside for 5 minutes until it solidifies into a rubbery texture. Microwave for 15 seconds to liquify, stir, and let cool for 3-5 minutes to lukewarm. Ensure it remains liquid when adding to the mixture to avoid lumps.
- Whip Cream: Beat 1 cup of cold heavy cream on high speed until stiff peaks form, about 2-3 minutes.
- Whip Cream Cheese Mixture: In a clean bowl (no need to clean beaters), beat softened cream cheese and 3/4 cup sugar on high speed for 2 minutes until fluffy and smooth. Add cooled, liquid gelatine and 1 tsp vanilla extract and beat for another 30 seconds to fully combine.
- Add Chocolate and Colour: Incorporate lukewarm melted 70% dark chocolate and 6 tsp red food colouring into the cream cheese mixture. Beat for 1 minute until well combined and the color is a deep scarlet red.
- Fold in Whipped Cream: Gently fold one-third of the stiff whipped cream into the cream cheese mixture until just combined. Then fold in the remaining whipped cream carefully to maintain airiness.
- Chill the Cheesecake: Pour the mixture into the prepared springform pan and refrigerate for at least 6 hours or until fully set.
- Remove Cheesecake: Release the springform pan sides and use the excess baking paper to slide the cheesecake from the base onto a serving platter. Peel off the paper lining from the sides and base.
- Prepare Topping Whipped Cream: Beat 1 1/4 cups cold heavy cream, 3 tbsp caster sugar, and 1 tsp vanilla extract on high speed for about 2 minutes until softly whipped. Optionally, use stabilisers if making ahead.
- Decorate: Spoon or pipe the whipped cream onto the center of the cheesecake, leaving a 2.5 cm (1″) border around the edges. Sprinkle with shaved or grated dark chocolate. Serve chilled.
Notes
- Use unflavoured gelatine to avoid altering the cheesecake flavor.
- Ensure gelatine is always added warm and liquid to prevent lumps.
- Melt chocolate gently to avoid seizing, preferably in a microwave with short bursts or double boiler.
- Red food colouring quantity is important to achieve a deep scarlet color versus bright red; adjust if needed.
- You can stabilize whipped cream with gelatin or commercial stabilizers to prevent deflation if preparing in advance.
- Using an inverted springform pan base makes removal cleaner and easier.
- Oreo cookie base adds a chocolate crunch that complements the creamy filling perfectly.
- Prep Time: 30 minutes
- Cook Time: 0 minutes
- Category: Dessert
- Method: No-Cook
- Cuisine: American
Keywords: red velvet cheesecake, no bake cheesecake, Oreo crust, red velvet dessert, chocolate cheesecake, cheesecake recipe