
Meringue Nest Cheesecake with Mini Eggs Recipe
Introduction
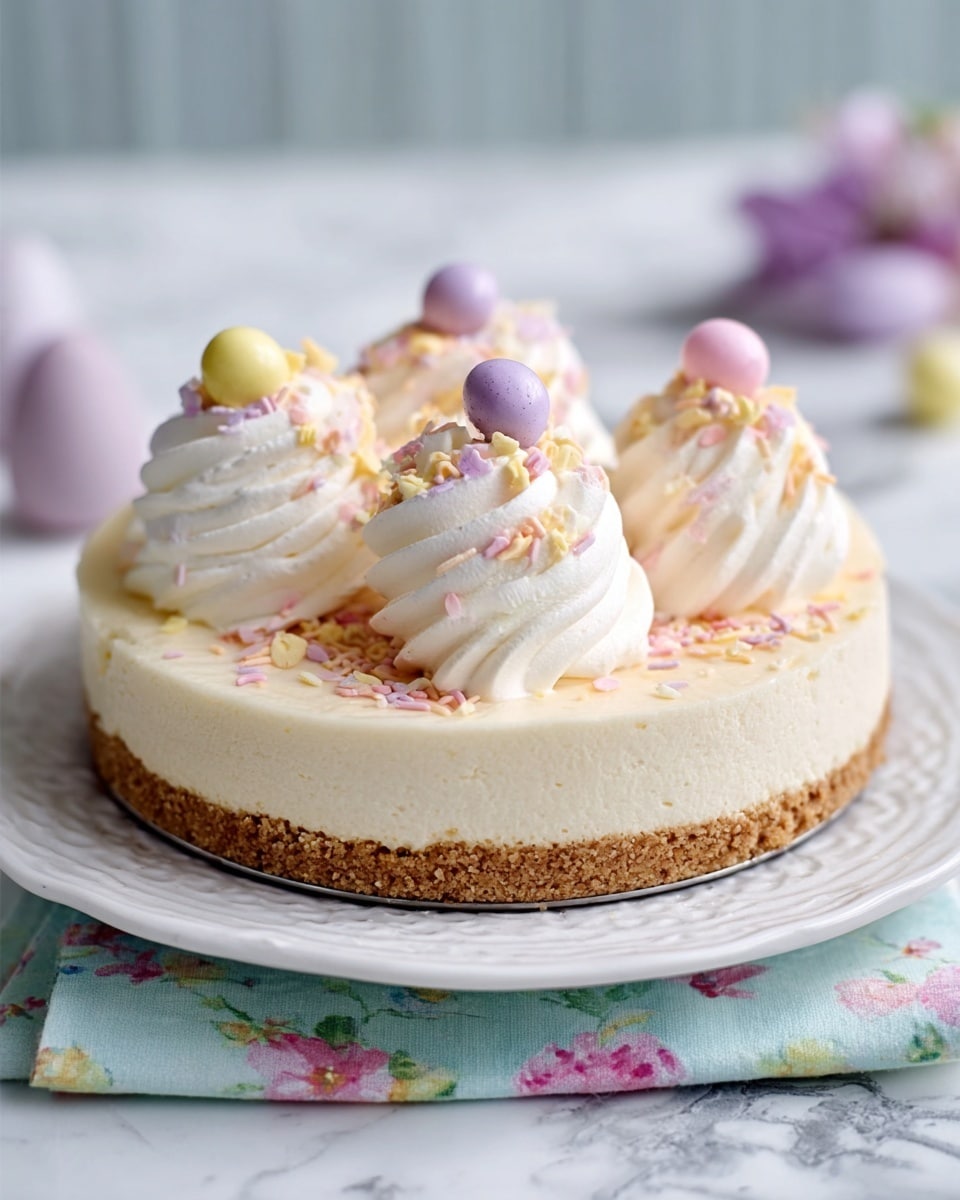
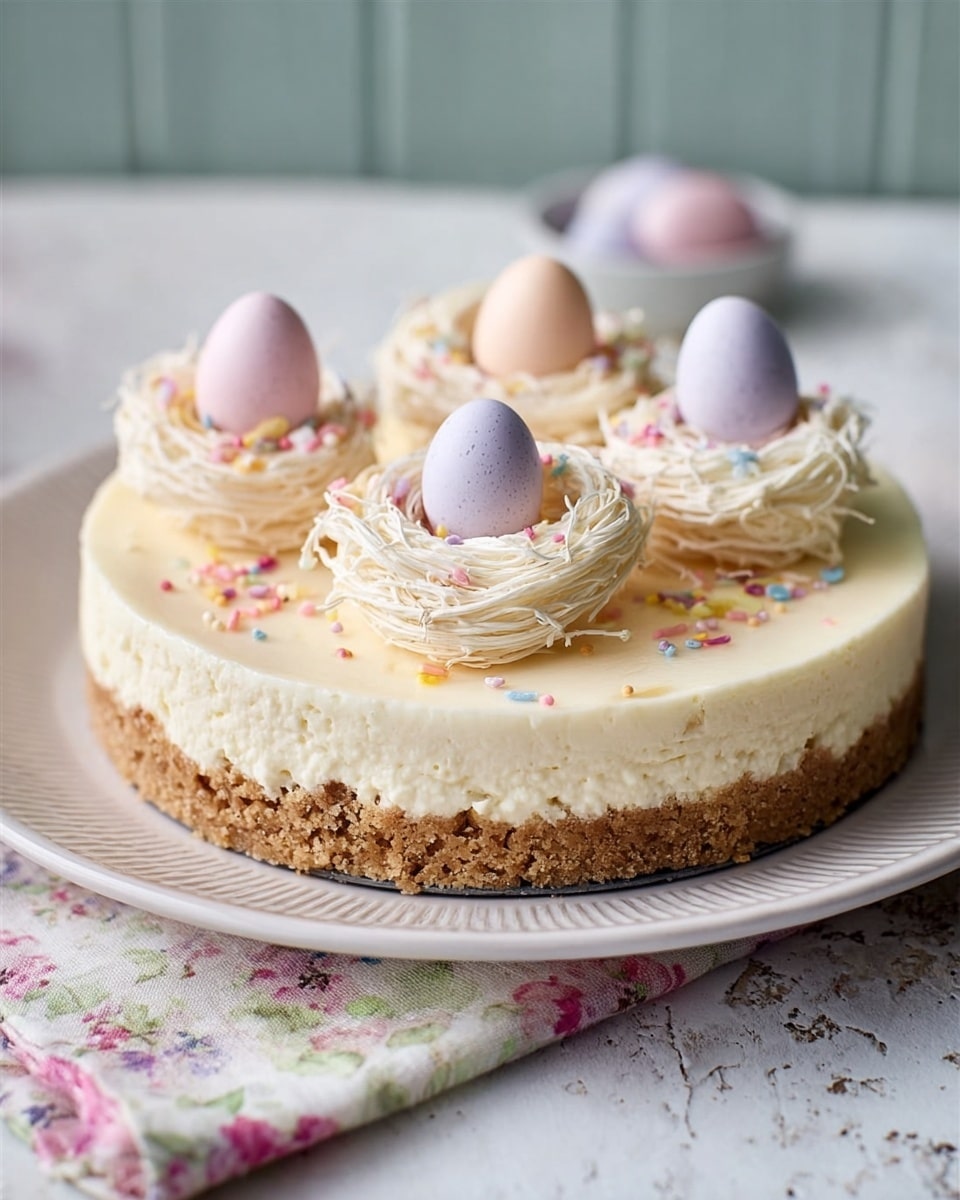
This meringue nest cheesecake is a delightful no-bake treat perfect for springtime or Easter celebrations. With a crunchy chocolate biscuit base, creamy lemon cheesecake filling, and fun mini egg decorations, it’s both delicious and visually charming.
Ingredients
- 100g butter plus extra for greasing
- 14 chocolate digestives
- 397g can condensed milk
- Juice of 2 lemons
- 280g cream cheese
- 25g toasted coconut flakes or white chocolate curls
- 3 meringue nests
- 9 mini eggs
- Hundreds and thousands (sprinkles)
- 3 chenille chicks (optional)
Instructions
- Step 1: Grease an 18cm loose-bottomed round cake tin with butter and line the base with a circle of baking paper.
- Step 2: Melt the butter in a large heatproof bowl using the microwave or over low heat in a pan.
- Step 3: Crush the chocolate digestives into fine crumbs using a food processor, then mix the crumbs into the melted butter.
- Step 4: Press the biscuit mixture firmly into the base of the prepared tin using the back of a spoon.
- Step 5: In a large mixing bowl, whisk together the condensed milk, lemon juice, and cream cheese until smooth.
- Step 6: Pour the cheesecake mixture over the biscuit base and smooth the top with a spatula.
- Step 7: Refrigerate the cheesecake for at least 2 hours or preferably overnight to set.
- Step 8: When ready to serve, carefully remove the cheesecake from the tin and transfer to a serving plate or cake stand.
- Step 9: Sprinkle the top with toasted coconut flakes, building a larger mound in the center.
- Step 10: Arrange the meringue nests on top, then fill each nest with mini eggs, extra coconut flakes, hundreds and thousands, and optional chenille chicks for decoration.
Tips & Variations
- For a different flavor, replace lemon juice with lime or orange juice to add a citrus twist.
- White chocolate curls can be used instead of toasted coconut for a richer topping.
- If you prefer a crunchier base, add a handful of chopped nuts to the biscuit mixture.
- Use pastel-colored sprinkles to suit any festive occasion.
Storage
Store the cheesecake in the refrigerator covered loosely with cling film or a cake dome. It will keep fresh for up to 3 days. Avoid freezing as the texture of the meringue nests and cheesecake may change. Remove from fridge 10 minutes before serving for the best flavor and texture.
How to Serve
Serve this delicious recipe with your favorite sides.
FAQs
Can I make this cheesecake ahead of time?
Yes, it’s best to prepare it at least a few hours in advance or overnight so the filling sets well. Add the meringue nests and decorations just before serving to keep them crisp.
What if I don’t have mini eggs or chenille chicks?
You can substitute mini eggs with any small colorful candies or chocolate buttons. The chenille chicks are optional and just add a cute touch, so the cheesecake is delicious without them too.
Print
Meringue Nest Cheesecake with Mini Eggs Recipe
- Total Time: 2 hours 20 minutes (including chilling time)
- Yield: 8 servings 1x
Description
This delightful Meringue Nest Cheesecake with Mini Eggs is a no-bake, refreshing dessert perfect for spring celebrations or any festive occasion. Featuring a crunchy chocolate digestive biscuit base, a creamy lemon-infused cheesecake filling, topped with crisp meringue nests, toasted coconut flakes, colorful mini eggs, and festive decorations, it combines textures and flavors beautifully. Easy to prepare and chill, it’s a crowd-pleasing centerpiece that’s as charming as it is delicious.
Ingredients
Base
- 100g butter plus extra for greasing
- 14 chocolate digestives
Cheesecake Filling
- 397g can condensed milk
- Juice of 2 lemons
- 280g cream cheese
Topping and Decoration
- 25g toasted coconut flakes or white chocolate curls
- 3 meringue nests
- 9 mini eggs
- Hundreds and thousands (sprinkles)
- 3 chenille chicks (optional)
Instructions
- Prepare the Base: Grease an 18cm loose-bottomed round cake tin with butter and line the base with a circle of baking paper. Melt 100g of butter in a large heatproof bowl using a microwave or in a medium pan over low heat. Meanwhile, blitz the 14 chocolate digestives in a food processor until they become fine crumbs. Combine the crumbs with melted butter thoroughly.
- Form the Biscuit Base: Spoon the biscuit mixture evenly into the prepared tin and press it down firmly using the back of a spoon to create a compact base. Place this in the refrigerator to set while you prepare the filling.
- Make the Cheesecake Filling: In a large mixing bowl, whisk together the condensed milk, lemon juice, and cream cheese until the mixture is smooth and fully combined. Be sure the cream cheese is at room temperature for easier blending.
- Assemble the Cheesecake: Pour the cheesecake filling over the biscuit base in the tin. Smooth the top using a spatula to create an even surface. Refrigerate for at least 2 hours or ideally overnight to allow the cheesecake to set properly.
- Decorate Before Serving: When ready to serve, carefully release the cheesecake from the tin and transfer it to a serving plate or cake stand. Generously sprinkle the top with toasted coconut flakes, forming a mound in the center. Arrange the 3 meringue nests on top of the coconut mound.
- Add Mini Eggs and Sprinkles: Fill each meringue nest with mini eggs. Sprinkle additional coconut flakes and hundreds and thousands sprinkles over the entire cheesecake for a colorful finish. Optionally, place 3 chenille chicks around the cake for festive decoration.
Notes
- Use room temperature cream cheese for a smoother filling.
- Chilling the cheesecake overnight enhances the texture and flavor.
- Substitute toasted coconut flakes with white chocolate curls for a different garnish variation.
- If you don’t have a food processor, place the digestives in a zip-lock bag and crush with a rolling pin.
- The meringue nests add a crunchy texture contrast, so avoid placing them too early to keep them crisp.
- Prep Time: 20 minutes
- Cook Time: 0 minutes
- Category: Dessert
- Method: No-Cook
- Cuisine: British
Keywords: meringue nest cheesecake, mini eggs cheesecake, no-bake cheesecake, Easter dessert, lemon cheesecake, chocolate digestive base

