
Skillet Berry Cobbler with Buttermilk Biscuits Recipe
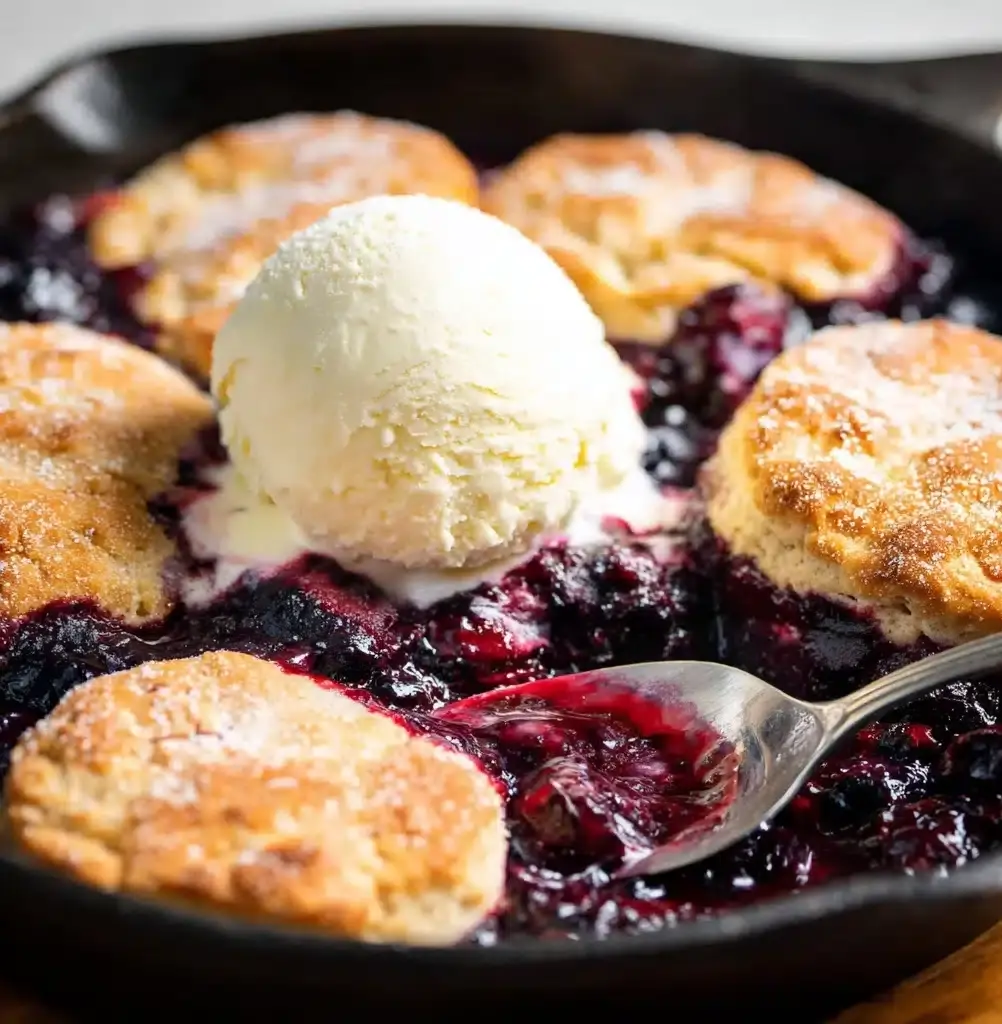
If you’re craving a dessert that feels like a warm hug and bursts with vibrant flavors, you are absolutely going to fall in love with this delightful Skillet Berry Cobbler with Buttermilk Biscuits. Imagine juicy, mixed berries bubbling away in a cast-iron skillet while fluffy, golden buttermilk biscuits bake on top, creating a perfect balance of sweet, tart, and buttery richness. This recipe is the ultimate comfort food that’s both easy to make and impressive enough to serve all year round, whether it’s a casual family dinner or a weekend treat with friends. Trust me, the harmonious blend of fresh berries and buttery biscuits will have everyone asking for seconds in no time!

Ingredients You’ll Need
These ingredients may look simple, but each one plays a crucial role in building the incredible flavor and texture of the Skillet Berry Cobbler with Buttermilk Biscuits. From the fresh berries that bring juicy bursts of sweetness, to the buttery biscuits that add a tender, flaky top layer, every element combines to create a dessert that’s both rustic and refined.
- 4 1/2 cups assorted berries: A colorful medley of strawberries, raspberries, blueberries, and blackberries form the juicy, flavorful base.
- 1/2 cup white sugar: Balances the tartness of the berries with just the right sweetness.
- 1/4 cup brown sugar: Adds depth and a hint of caramel flavor to the filling.
- 1 teaspoon lemon juice: Brightens the berry mixture and enhances natural flavors.
- 1 teaspoon vanilla extract: Brings warmth and complements the fruit beautifully.
- 1/2 teaspoon sea salt: Elevates the overall taste by balancing the sweetness.
- 1/2 teaspoon cinnamon: Provides a gentle spice that pairs perfectly with berries.
- 2 tablespoons cornstarch: Thickens the berry juices into a luscious, jammy filling.
- Pinch of ground nutmeg: Adds subtle warmth and complexity to the filling.
- 2 cups all-purpose flour: The foundation for tender, flaky buttermilk biscuits.
- 1 teaspoon baking soda: Helps the biscuits rise and become delightfully light.
- 1/2 teaspoon sea salt: Enhances the biscuit’s flavor perfectly.
- 1 teaspoon white sugar: Adds a touch of sweetness to the biscuits.
- Zest of 1 orange: Infuses fresh citrus aroma and flavor into the biscuit dough.
- 1/2 cup unsalted butter, chilled and cubed: Makes the biscuits golden and flaky when baked.
- 3/4 cup buttermilk: Creates tender, moist biscuits with a subtle tang.
How to Make Skillet Berry Cobbler with Buttermilk Biscuits
Step 1: Preheat and Prepare the Filling
Start by preheating your oven to 375 degrees Fahrenheit. This ensures the oven is ready for baking once your cobbler is assembled. In a large bowl, combine your assorted berries with both sugars, lemon juice, vanilla extract, sea salt, cinnamon, cornstarch, and a pinch of nutmeg. Stir everything together gently until the berries are evenly coated. Cover the bowl with a towel and set it aside so the flavors can meld while you prepare the biscuit dough.
Step 2: Make the Buttermilk Biscuit Dough
In another large bowl, whisk together the flour, baking soda, sugar, orange zest, and salt. It’s the orange zest that gives these biscuits their unexpected pop of freshness—don’t skip it! Next, add your chilled, cubed butter to the dry mix. Using a pastry blender, two forks, or even a food processor, cut the butter into the flour until you see coarse crumbs forming with little pea-sized pieces of butter still visible. This texture will give you those tender, flaky biscuit layers every bite dreams of.
Step 3: Incorporate Buttermilk and Fold the Dough
Pour the buttermilk into your crumbly mixture and stir just until combined—you want to avoid overmixing to keep the biscuits tender. Turn the dough onto a lightly floured surface and gently roll it out into a rectangular shape about half an inch thick. Then, fold the dough into thirds like a letter and roll it out again into the same shape. Repeat this folding and rolling process two more times to create flaky layers without sealing the edges too much.
Step 4: Cut the Biscuit Rounds
Using a 3-inch biscuit cutter or the top of a drinking glass, cut your dough into rounds. Aim for about seven biscuits to fit nicely atop your cobbler. Don’t worry if some dough scraps are left over, just gently press them together, roll them out carefully, and cut more rounds until you’ve used all the dough.
Step 5: Assemble and Bake the Cobbler
Pour the berry filling into an oven-safe skillet or pie pan, spreading it out evenly. Arrange the biscuit rounds on top of the berries—don’t overlap them—allowing each biscuit to sink a little into the fruit as it bakes. Place the skillet in the oven and bake for 45 minutes, until the biscuits are a gorgeous golden brown and the berry filling is bubbling excitedly. Once out of the oven, give it at least 30 minutes to cool before serving so the filling can thicken to perfection.
How to Serve Skillet Berry Cobbler with Buttermilk Biscuits
Garnishes
Top your warm Skillet Berry Cobbler with Buttermilk Biscuits with a generous scoop of vanilla ice cream for a creamy contrast, or add a dollop of whipped cream tossed with fresh mint leaves for elegance. A dusting of powdered sugar right before serving can add a touch of pretty sweetness, too.
Side Dishes
This cobbler stands out best when served on its own due to its rich flavors, but if you want to complement it, consider light sides like a simple green salad or a tangy lemon sorbet to cleanse your palate between bites. It’s also fantastic alongside a hot cup of tea or freshly brewed coffee for an indulgent afternoon treat.
Creative Ways to Present
For a rustic charm, serve the cobbler directly from a cast-iron skillet at the table—that sizzling, bubbling presentation is show-stopping. Alternatively, spoon individual portions into small ramekins for a more refined touch, perfect for guests. You can also sprinkle toasted nuts or fresh herbs like thyme on top for unexpected texture and flavor layers.
Make Ahead and Storage
Storing Leftovers
If you happen to have leftovers of this Skillet Berry Cobbler with Buttermilk Biscuits, simply cover the skillet tightly with plastic wrap or transfer portions to an airtight container and store in the refrigerator. It will keep well for up to 3 days while maintaining its lovely flavors.
Freezing
To freeze, assemble the cobbler without baking and cover it tightly with foil. When ready to enjoy, bake it straight from frozen, adding extra baking time as needed until bubbly and golden. Freezing after baking is also possible—wrap cooled leftovers well and freeze for up to 2 months, then thaw overnight before reheating.
Reheating
Reheat your cobbler in a 350-degree oven for 15–20 minutes until warmed through and the biscuit topping regains a fresh-baked texture. Avoid microwaving if you want to keep the biscuit edges crisp and flaky. A few minutes under the broiler at the end can revive the golden finish beautifully.
FAQs
Can I use frozen berries for the Skillet Berry Cobbler with Buttermilk Biscuits?
Absolutely! Frozen berries work wonderfully here and often give you more consistent sweetness year-round. Just be sure not to thaw them beforehand; adding them frozen helps prevent a watery cobbler.
What if I don’t have buttermilk—can I substitute it?
No worries if there’s no buttermilk on hand. Just combine 3/4 cup of milk with 1 tablespoon of lemon juice or white vinegar and let it sit for 5 minutes. This homemade buttermilk substitute will give your biscuits the same tender, tangy quality.
How can I make my biscuits extra flaky?
The key is keeping your butter chilled and handling the dough as little as possible. Folding the dough multiple times creates layers, so don’t skip that step and avoid overworking your dough to keep those delightful flakes.
Can I double the recipe for a larger crowd?
Definitely! You can easily double the ingredients and bake in a larger oven-safe dish or two skillets. Just keep an eye on the baking time since it might take slightly longer for the filling to bubble through.
Is it possible to make this dessert gluten-free?
Yes! Simply swap out the all-purpose flour for a gluten-free blend suitable for baking. The texture might change slightly, but the flavor will remain incredible. Be sure your baking soda and other ingredients are gluten-free as well.
Final Thoughts
Once you try this Skillet Berry Cobbler with Buttermilk Biscuits, it will quickly become a cherished recipe in your collection. It’s the kind of dessert that’s both effortlessly homey and irresistibly delicious, perfect for creating wonderful memories around the table. So grab those fresh berries and your skillet, and get ready to bake something truly special that feels like a loving celebration of simple ingredients done right!
Print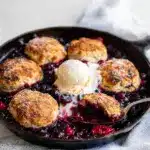
Skillet Berry Cobbler with Buttermilk Biscuits Recipe
- Total Time: 1 hour 5 minutes
- Yield: 7 servings 1x
- Diet: Vegetarian
Description
This Skillet Berry Cobbler with Buttermilk Biscuits is a delightful, rustic dessert featuring a medley of fresh or frozen berries baked under tender, flaky buttermilk biscuit topping. Sweetened with white and brown sugar, kissed with warm spices and citrus zest, this dessert perfectly balances rich, buttery biscuits with the juicy, vibrant berry filling. It’s an ideal treat for gatherings or comfort food cravings.
Ingredients
Berry Filling
- 4 1/2 cups assorted berries (fresh or frozen; strawberries, raspberries, blueberries, blackberries)
- 1/2 cup white sugar
- 1/4 cup brown sugar
- 1 teaspoon lemon juice
- 1 teaspoon vanilla extract
- 1/2 teaspoon sea salt
- 1/2 teaspoon cinnamon
- 2 tablespoons cornstarch
- Pinch of ground nutmeg
Buttermilk Biscuits
- 2 cups all-purpose flour
- 1 teaspoon baking soda
- 1/2 teaspoon sea salt
- 1 teaspoon white sugar
- Zest of 1 orange
- 1/2 cup unsalted butter, cut into cubes and chilled
- 3/4 cup buttermilk
Instructions
- Preheat the oven: Set your oven to 375˚F (190˚C) to ensure it reaches the perfect temperature for baking the cobbler and biscuits evenly.
- Prepare the berry filling: In a large bowl, combine the assorted berries, white sugar, brown sugar, lemon juice, vanilla extract, sea salt, cinnamon, cornstarch, and a pinch of nutmeg. Stir gently to mix all ingredients evenly. Cover the bowl with a towel and set aside to let the flavors meld.
- Mix dry biscuit ingredients: In a separate large mixing bowl, whisk together the all-purpose flour, baking soda, white sugar, orange zest, and sea salt until well combined.
- Cut in the butter: Add the chilled, cubed unsalted butter to the dry ingredients. Using a pastry blender, two forks, or a food processor, cut the butter into the flour mixture until it resembles coarse crumbs. The butter pieces should be pea-sized for flakiness.
- Add buttermilk: Pour in the buttermilk and stir gently with a wooden spoon or spatula until just combined. The dough will be slightly sticky but should hold together.
- Roll and fold the dough: Turn the dough onto a lightly floured surface. Gently roll it into a rectangle about 1/2 inch thick, taking care not to stretch the edges too thin. Fold the dough into thirds, like folding a letter, then roll out again into the same 1/2 inch rectangle. Repeat this folding and rolling process two more times to create flaky layers.
- Cut biscuit rounds: Using a 3-inch biscuit cutter or the top of a drinking glass, cut the dough into rounds. You should be able to fit about seven biscuits into your skillet.
- Assemble the cobbler: Pour the prepared berry filling into an oven-safe skillet or pie pan. Arrange the biscuit rounds on top, covering the filling.
- Bake the cobbler: Place the skillet in the preheated oven and bake for approximately 45 minutes, or until the biscuits are golden brown and the berry filling is bubbly around the edges.
- Cool and serve: Remove the skillet from the oven and allow the cobbler to cool for at least 30 minutes to let the filling thicken. Serve warm, ideally topped with a scoop of vanilla ice cream for an indulgent finish.
Notes
- You can use any combination of berries you like—fresh or frozen both work well.
- Be careful not to overwork the biscuit dough to maintain flakiness.
- If you don’t have buttermilk, substitute with 3/4 cup milk plus 1 tablespoon lemon juice, let sit 5 minutes before using.
- The cobbler is best served warm, freshly baked or reheated gently.
- Leftovers can be refrigerated for up to 3 days and warmed before serving.
- For a gluten-free option, use a gluten-free all-purpose flour blend.
- Prep Time: 20 minutes
- Cook Time: 45 minutes
- Category: Dessert
- Method: Baking
- Cuisine: American
Nutrition
- Serving Size: 1/7 of cobbler (about 1 biscuit with berry filling)
- Calories: 320 kcal
- Sugar: 24 g
- Sodium: 280 mg
- Fat: 15 g
- Saturated Fat: 9 g
- Unsaturated Fat: 5 g
- Trans Fat: 0.2 g
- Carbohydrates: 40 g
- Fiber: 4 g
- Protein: 4 g
- Cholesterol: 40 mg
Keywords: berry cobbler, buttermilk biscuits, skillet dessert, berry dessert, easy cobbler recipe, summer dessert, fruity cobbler
