
sourdough bread recipe
If you have ever dreamed of baking your own artisan loaf at home, this sourdough bread recipe is going to become your new best friend in the kitchen. The process may seem detailed, but each step gently guides you to create that perfect balance of a crisp, golden crust and a tender, chewy crumb bursting with subtle tanginess. This sourdough bread recipe captures everything wonderful about homemade bread, from the simple, wholesome ingredients to the rewarding ritual of nurturing the dough. Prepare yourself for an experience that’s as satisfying in the baking as it is delicious to eat.

Ingredients You’ll Need
Keeping the ingredients simple is key to unlocking the true magic behind this sourdough bread recipe. Each element plays an essential role, blending to create texture, flavor, and color that elevate your loaf above ordinary bread.
- Bread flour (500 g): The high protein content develops gluten for that chewy, structured crumb you want in good sourdough.
- Water, lukewarm (350 g): Warm water activates the fermentation and hydrates the flour for better gluten formation.
- Active sourdough starter (100 g): This is your living culture—responsible for the natural rise and complex, tangy flavor.
- Salt (10 g): Enhances flavor and strengthens the dough structure without overpowering the subtle sour notes.
How to Make sourdough bread recipe
Step 1: Mix Flour and Water (Autolyse)
Start by combining the bread flour and lukewarm water in a large mixing bowl. Stir gently until you get a shaggy, uneven dough and then let it rest for 30 minutes. This autolyse stage allows the flour to fully hydrate, kick-starting gluten development and deepening the bread’s flavor without any extra effort.
Step 2: Incorporate Starter and Salt
Once your dough has rested, add your active, bubbly sourdough starter along with the salt. Mix everything thoroughly, ensuring the starter and salt are evenly dispersed throughout the dough. This step fuels fermentation and seasoning, so take your time for an even mix.
Step 3: Kneading or Stretch and Fold
You have two options here: either knead the dough on a lightly floured surface for approximately 10 minutes until it becomes smooth and elastic, or use the stretch and fold technique right in the bowl. If you choose the latter, perform a set of folds every 30 minutes over the next 2 to 4 hours. The stretch and fold method is wonderful for beginners and prevents overworking the dough.
Step 4: Bulk Fermentation
Transfer your kneaded dough to a lightly oiled bowl, cover it with a kitchen towel, and leave it at room temperature for 4 to 6 hours. This is when all the magic happens—your dough will double in size as the natural yeasts work their wonders, developing the distinctive sourdough tang and an airy texture.
Step 5: Pre-Shaping and Resting
After fermentation, gently take the dough out of the bowl and shape it into a loose ball on a floured surface. Cover it with a towel and let it rest for 30 minutes. This rest period helps relax the gluten so the final shaping is easier and more precise.
Step 6: Final Shaping and Proofing
Shape the dough again into a tight ball, being mindful to create surface tension by pulling the dough taut as you shape. Place it seam-side down into a well-floured proofing basket or bowl. Cover and proof for an additional 2 to 4 hours at room temperature, or better yet, refrigerate overnight. The slow, cold fermentation intensifies the flavor and improves crust texture.
Step 7: Oven and Dutch Oven Preheating
At least 30 minutes before baking, preheat your oven to 450°F (232°C). If you have a Dutch oven or heavy baking pot, place it inside to preheat as well. This step is crucial for achieving that incredible oven spring and crispy crust.
Step 8: Scoring the Dough
Carefully transfer your proofed dough onto parchment paper. Use a sharp knife or bread lame to score the top—these cuts allow the bread to expand beautifully during baking while creating a rustic, artisanal appearance.
Step 9: Baking with Lid On
Lift your dough on the parchment paper into your preheated Dutch oven. Cover it and bake for 30 minutes. The lid traps steam, which helps create the signature crispy crust and a shiny, blistered surface.
Step 10: Baking with Lid Off
Remove the lid and continue baking for another 10 to 15 minutes, or until your loaf turns a deep golden brown with a hollow sound when tapped underneath. This is your cue that the bread is perfectly baked through and has developed a robust crust.
Step 11: Cooling
Patience is key—cool the bread on a wire rack for at least one hour before slicing. This waiting time lets the crumb finish setting and prevents a gummy texture. Plus, it’s a great moment to enjoy that wonderful aroma slowly filling your kitchen.
How to Serve sourdough bread recipe

Garnishes
This bread is fantastic on its own, but toppings can make it even more special. A generous smear of good-quality butter or a drizzle of extra virgin olive oil sprinkled with flaky sea salt can lift your sourdough to new heights. Fresh herbs or a sprinkle of toasted seeds on top make it visually appealing and add texture.
Side Dishes
Sourdough pairs beautifully with a variety of dishes. Think buttery avocado spread for breakfast, hearty stews and soups for lunch or dinner, and tangy cheeses or charcuterie boards for entertaining. The bread’s tang and chew make every bite more exciting alongside rich or savory accompaniments.
Creative Ways to Present
Slice your sourdough thickly and toast it for a crunchy base on bruschettas or avocado toasts. Hollow it out and fill with warm dips or salads for an edible bread bowl. You can also turn leftover slices into rustic croutons for salads and soups, ensuring no crumb goes to waste.
Make Ahead and Storage
Storing Leftovers
Once cooled, store your sourdough bread in a paper bag or loosely wrapped in a kitchen towel at room temperature. This helps preserve the crust’s crispness while keeping the crumb soft. Avoid sealing it airtight when fresh, as this can encourage sogginess.
Freezing
If you want to enjoy your sourdough bread recipe longer, freeze it by wrapping the loaf tightly in plastic wrap followed by foil or a freezer bag. Slice beforehand if you plan to toast slices directly from the freezer. This method helps retain freshness for up to 3 months.
Reheating
To revive your sourdough’s crisp crust and soft inside, sprinkle a little water on the loaf’s surface and warm it in a 350°F (175°C) oven for 10–15 minutes. Avoid microwaving, as it often leads to a chewy or rubbery texture.
FAQs
What makes this sourdough bread recipe different from regular bread?
Sourdough relies on natural fermentation using a live starter instead of commercial yeast. This creates a unique tangy flavor, improved digestibility, and a crust that is both crispy and flavorful, setting it apart from standard breads.
How do I know if my sourdough starter is ready to use?
An active starter should be bubbly, have a pleasant tangy scent, and double in size a few hours after feeding. If it deflates quickly or smells off, it might need more time or feeding before baking.
Can I use all-purpose flour instead of bread flour?
While you can substitute all-purpose flour, bread flour is preferred because its higher protein content develops better gluten, resulting in a chewier and more structured loaf, which is essential for the best sourdough bread texture.
Why is scoring the dough important?
Scoring controls how the bread expands while baking. Without it, the dough might burst unevenly or tear, resulting in a less attractive loaf. The cuts give your bread a beautiful pattern and help achieve that artisanal look.
How long does the sourdough bread keep fresh?
When stored properly at room temperature, sourdough bread stays fresh for about 3 to 4 days. Beyond that, the crumb begins to dry out, although it can still be toasted or repurposed to avoid waste.
Final Thoughts
Baking your own sourdough bread recipe is as rewarding as it is delicious. With just a few simple ingredients and a little patience, you create a loaf that fills your home with warmth and your taste buds with joy. Give it a try—you’ll discover a newfound appreciation for the art of bread-making and a crackling crust that’s worth every moment of waiting.
Print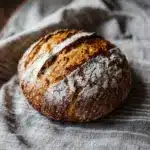
sourdough bread recipe
- Total Time: 6 to 12 hours (including resting and proofing time)
- Yield: 1 medium loaf (about 900-1000g) 1x
- Diet: Vegetarian
Description
This classic sourdough bread recipe yields a crusty, flavorful loaf with a chewy interior, perfect for sandwiches, toast, or enjoying on its own. Using just bread flour, water, salt, and an active sourdough starter, this method involves autolyse, fermentation, and baking in a hot oven or Dutch oven for a beautiful artisan bread.
Ingredients
Dry Ingredients
- 500 g bread flour
- 10 g salt
Wet Ingredients
- 350 g lukewarm water
- 100 g active and bubbly sourdough starter
Instructions
- Mix Flour and Water (Autolyse): In a large mixing bowl, combine 500g of bread flour and 350g of lukewarm water. Stir until a shaggy dough forms. Cover and let rest for 30 minutes to hydrate the flour and begin gluten development.
- Add Starter and Salt: After the autolyse, add 100g of active sourdough starter and 10g of salt into the bowl. Mix thoroughly until fully incorporated into the dough.
- Knead or Stretch and Fold: Knead the dough on a lightly floured surface for about 10 minutes until smooth and elastic. Alternatively, use the stretch and fold technique in the bowl every 30 minutes over 2-4 hours to develop gluten.
- Bulk Fermentation: Place the dough in a lightly oiled bowl, cover with a kitchen towel, and let it rise at room temperature for 4-6 hours until it doubles in size.
- Pre-shape and Rest: Carefully remove the dough and shape it into a loose ball. Let it rest on a lightly floured surface, covered with a towel, for 30 minutes.
- Final Shape and Proof: Reshape the dough into a tight ball and place it seam side down into a well-floured proofing basket or bowl. Cover and proof for 2-4 hours at room temperature or refrigerate overnight for enhanced flavor.
- Preheat Oven: Heat your oven to 450°F (232°C) for at least 30 minutes. If using a Dutch oven, place it inside to preheat as well.
- Score and Prepare for Baking: Transfer the dough onto parchment paper and score the top with a sharp knife or lame to allow the bread to expand during baking.
- Bake Covered: Carefully lift the dough using the parchment paper and place it into the preheated Dutch oven or onto a baking stone. Cover and bake for 30 minutes.
- Bake Uncovered: Remove the lid from the Dutch oven (if used) and bake an additional 10-15 minutes until the crust is deep golden and the loaf sounds hollow when tapped.
- Cool Before Slicing: Remove the bread from the oven and let it cool on a wire rack for at least 1 hour to set the crumb before slicing.
Notes
- Make sure your sourdough starter is active and bubbly before using for best fermentation.
- The autolyse step helps improve dough extensibility and flavor development.
- You can use stretch and folds instead of kneading for a more gentle gluten development process.
- Proofing overnight in the refrigerator enhances flavor and makes the dough easier to handle.
- Allowing the bread to cool fully prevents a gummy texture.
- Use a baking stone or Dutch oven for best crust and oven spring results.
- Prep Time: 45 minutes
- Cook Time: 45 minutes
- Category: Bread
- Method: Baking with fermentation
- Cuisine: Artisan / European
Nutrition
- Serving Size: 100 g
- Calories: 250 kcal
- Sugar: 0.5 g
- Sodium: 450 mg
- Fat: 1.5 g
- Saturated Fat: 0.2 g
- Unsaturated Fat: 1.3 g
- Trans Fat: 0 g
- Carbohydrates: 52 g
- Fiber: 2.5 g
- Protein: 8 g
- Cholesterol: 0 mg
Keywords: sourdough bread, artisan bread, homemade bread, fermented bread, crusty bread, bread baking


