
sourdough sandwich bread Recipe
If you’ve ever dreamed of biting into a loaf that’s wonderfully tangy, tender, and just perfect for every sandwich, then this sourdough sandwich bread recipe is going to become your new obsession. This bread combines the natural fermentation magic of sourdough with a soft, pillowy crumb that holds up beautifully under all your favorite fillings. Whether you’re dreaming of classic ham and cheese or a loaded veggie stack, this sourdough sandwich bread offers the ideal balance of chewiness and softness, making your sandwiches truly unforgettable.
Ingredients You’ll Need
These ingredients may seem simple, but every one of them plays an essential role in creating the perfect sourdough sandwich bread. From the flour’s structure-building power to the subtle sweetness of sugar, each component contributes to the flavor, texture, and appearance of your loaf.
- Bread flour: High in protein, it gives the dough strength and helps develop that wonderful chewy crumb.
- Water (room temperature): Hydrates the flour and starter, creating the dough’s perfect consistency.
- Active sourdough starter: This is the heart of the recipe, providing natural fermentation and that iconic tangy flavor.
- Salt: Enhances flavor and tightens the gluten network for better dough elasticity.
- Sugar (optional): Adds a touch of sweetness that balances the sour notes and can improve browning.
How to Make sourdough sandwich bread
Step 1: Combine Dry Ingredients
Start by mixing your bread flour and optional sugar in a large mixing bowl. This ensures even distribution of the sugar so that every bite has just a hint of sweetness balanced with the sour tang.
Step 2: Mix Starter and Water
In a separate bowl, stir together the room temperature water and your active sourdough starter until fully combined. This mixture is what breathes life into your dough, setting fermentation in motion.
Step 3: Form the Dough
Gradually introduce the wet mixture to the dry ingredients, gently stirring until you get a shaggy, sticky dough that’s ready to rest. This initial rough mix creates gluten strands as the dough settles.
Step 4: Autolyse Rest
Let the dough rest unshaped for 30 minutes. This stage helps with gluten development without heavy kneading, improving the dough’s elasticity and texture.
Step 5: Add Salt and Knead
Sprinkle the salt over the dough, then knead for 5 to 10 minutes until it becomes smooth and elastic. This step slows fermentation just enough and strengthens the dough for its rise.
Step 6: First Rise and Stretch-and-Fold
Transfer your dough to a lightly oiled bowl and cover it to rise at room temperature for 4 to 6 hours. Every hour, perform gentle stretch-and-folds to build structure and evenly distribute gas bubbles that create those beautiful holes inside.
Step 7: Shape the Loaf
Once doubled in size, turn the dough onto a floured surface and shape it into a tight loaf by rolling it from a rectangle shape. This shaping step helps create an even crumb and beautiful oven spring.
Step 8: Second Proof
Place your shaped dough seam side down into a greased loaf pan, cover, and let it rise for 1 to 2 hours until puffed and airy to the touch. This final rise is crucial for that tender crumb in sourdough sandwich bread.
Step 9: Preheat the Oven
While the dough proofs, preheat your oven to 450 degrees Fahrenheit (230 degrees Celsius) with a baking stone or tray inside to ensure a hot, even surface for baking.
Step 10: Score the Dough
Just before baking, score the top of the loaf with a sharp knife or lame. This controls how the loaf expands in the oven and allows steam to escape, ensuring a beautiful golden crust.
Step 11: Bake to Golden Perfection
Bake for around 35 minutes until the crust is a deep golden brown and the bottom sounds hollow when tapped—a classic test for doneness and perfect crust formation.
Step 12: Cool Properly
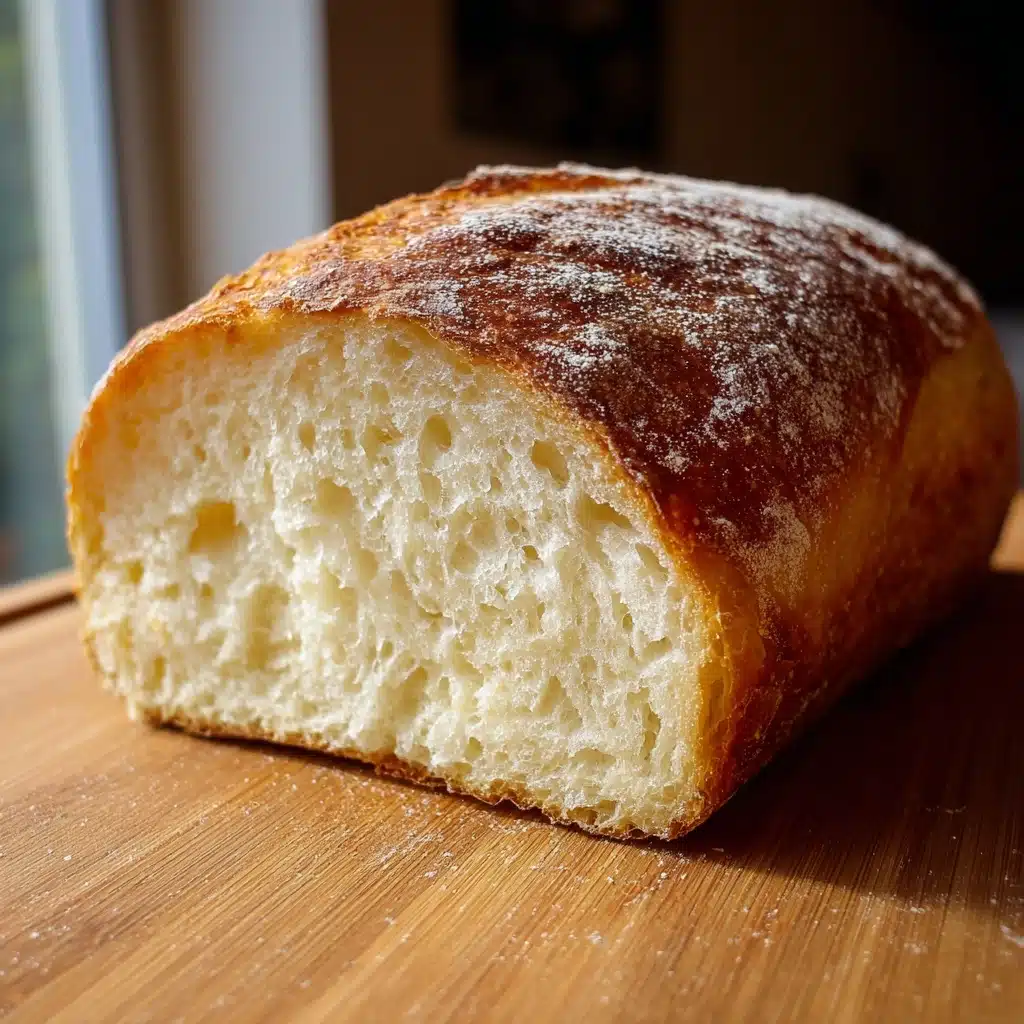
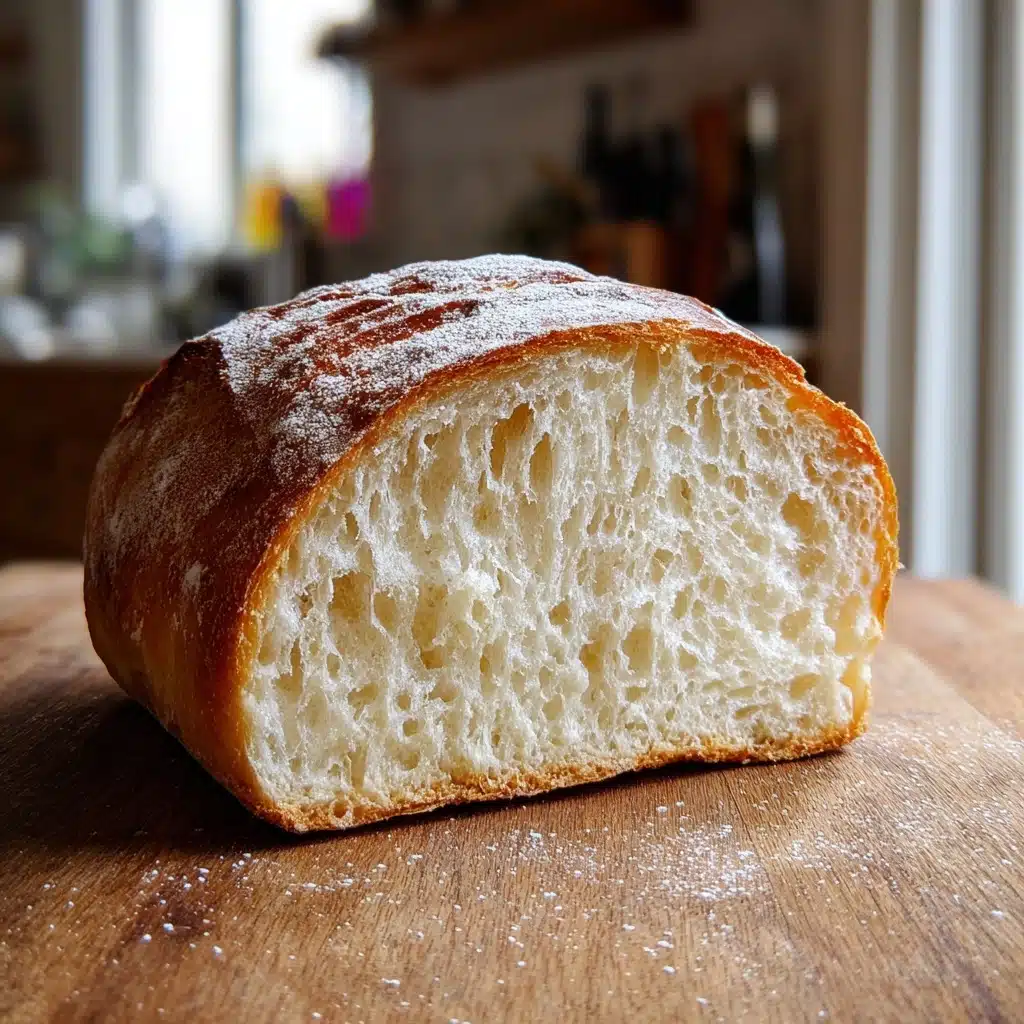
Remove the loaf from the oven and let it cool in the pan for 10 minutes, then transfer it to a wire rack. Cooling completely is essential for the crumb to set and flavors to mellow before slicing.
How to Serve sourdough sandwich bread
Garnishes
While the bread itself is a delight, adding delicate touches like a smear of softened herb butter or a sprinkle of flaky sea salt enhances the natural tang and crusty texture without overpowering it.
Side Dishes
Sourdough sandwich bread pairs perfectly with fresh, crunchy sides like crisp garden salads, pickles, or a bowl of hearty soup. These complementary textures and flavors make every bite a celebration.
Creative Ways to Present
Try toasting slices lightly to bring out the nutty aroma and serve open-faced with avocado, smoked salmon, or your favorite cheese board accompaniments. This bread’s sturdy yet soft texture is great for both rustic and elegant presentations.
Make Ahead and Storage
Storing Leftovers
Keep your sourdough sandwich bread wrapped loosely in a clean kitchen towel or paper bag at room temperature for up to three days. This balances moisture retention and crust crispness.
Freezing
Slice before freezing to make it easy to grab a few pieces at a time. Wrap the slices tightly in plastic wrap and foil to prevent freezer burn for up to three months.
Reheating
To refresh the bread, toast slices directly from frozen or warm the whole loaf in a preheated oven at 350 degrees Fahrenheit for 10 to 15 minutes. This restores the crispy crust and soft interior beautifully.
FAQs
Can I use all-purpose flour instead of bread flour?
You can substitute all-purpose flour, but bread flour’s higher protein content is key to developing the chewy texture and structure essential for sourdough sandwich bread.
How do I know my sourdough starter is active and ready?
A healthy starter should double in size within 4 to 6 hours of feeding and pass the float test—meaning a spoonful floats in water, indicating good fermentation power.
Why do I need to do stretch-and-folds during the first rise?
This technique helps strengthen gluten and evenly distribute air pockets, which contributes to a better crumb structure and loaf volume without heavy kneading.
Can I add seeds or nuts to this recipe?
Absolutely! Incorporate them during the initial mixing stage for flavor and texture boosts. Just be mindful of the amounts, so they don’t weigh down the dough.
What causes a dense loaf, and how can I avoid it?
Dense bread usually results from underproofing, inactive starter, or insufficient gluten development. Following the rise times and stretch-and-folds closely will help you avoid this.
Final Thoughts
Making your own sourdough sandwich bread at home is such a rewarding experience that brings warmth and flavor to your table in the most delightful way. With just simple ingredients and a bit of patience, you’ll soon have a loaf that’s not only delicious but also a proud accomplishment. I encourage you to try this recipe—you’ll fall in love with both the process and the incredible taste of every sandwich you create!
Print
sourdough sandwich bread Recipe
- Total Time: 5 to 7 hours (including rise times)
- Yield: 1 loaf (about 800g to 900g bread) 1x
- Diet: Vegetarian
Description
A classic sourdough sandwich bread recipe that yields a soft, tangy, and flavorful loaf perfect for everyday sandwiches. This recipe uses a natural sourdough starter for fermentation, creating a delicious depth of flavor with a tender crumb and a crispy crust. Suitable for home bakers seeking an artisanal homemade bread.
Ingredients
Main Ingredients
- 450 g bread flour
- 300 g water (room temperature)
- 100 g active sourdough starter
- 10 g salt
- 10 g sugar (optional, for sweetness)
Instructions
- Combine dry ingredients: In a mixing bowl, combine 450g of bread flour and 10g of sugar if you desire a slightly sweeter bread. Mix thoroughly to distribute the sugar evenly.
- Mix starter with water: In a separate bowl, combine 300g of room temperature water with 100g of your active sourdough starter. Stir well until completely combined to help the starter ferment evenly.
- Form the dough: Gradually add the water and starter mixture into the flour mixture. Stir until a shaggy dough forms and there are no dry bits remaining.
- Autolyse (rest): Let the dough rest uncovered for 30 minutes. This resting period allows the flour to fully hydrate and helps with gluten development for a better dough structure.
- Add salt and knead: Sprinkle 10g of salt over the dough. Knead the dough by hand or with a stand mixer for about 5 to 10 minutes until the dough becomes smooth, elastic, and slightly tacky but not sticky.
- Bulk fermentation: Transfer the kneaded dough to a lightly oiled bowl. Cover with plastic wrap or a kitchen towel. Let the dough rise at room temperature for 4 to 6 hours or until doubled in size. Perform a series of stretch and folds every hour to strengthen the dough.
- Shape the dough: Once risen, turn the dough onto a lightly floured surface. Flatten it into a rectangle and then tightly roll it into a loaf shape, pinching the seam to seal.
- Proof the dough: Place the shaped dough seam side down into a greased loaf pan. Cover it again and let it rise for 1 to 2 hours, until it has puffed up noticeably but not completely doubled.
- Preheat the oven: Preheat your oven to 450°F (230°C) with a baking stone or inverted baking tray inside to create a hot surface for baking, which helps with oven spring.
- Score the loaf: Using a sharp knife or bread lame, score the top of the loaf to allow steam to escape during baking, preventing unwanted cracks.
- Bake the bread: Place the loaf pan in the oven and bake for approximately 35 minutes until the crust is golden brown and the bread sounds hollow when tapped on the bottom.
- Cool the bread: Remove the bread from the oven and let it cool in the pan for 10 minutes. Then, transfer it to a wire rack to cool completely before slicing to preserve the crumb structure.
Notes
- Use an active sourdough starter that has been recently fed and is bubbly for the best rise.
- Sugar is optional but adds a touch of sweetness and helps with browning the crust.
- Performing stretch and folds during bulk fermentation strengthens gluten, improving bread texture.
- Letting the bread cool completely before slicing will prevent it from becoming gummy.
- For a crispier crust, you can spray the oven with water or add steam during the first 10 minutes of baking.
- Prep Time: 45 minutes
- Cook Time: 35 minutes
- Category: Bread
- Method: Baking
- Cuisine: Artisan / Western
Nutrition
- Serving Size: 1 slice (about 50g)
- Calories: 140 kcal
- Sugar: 1.5 g
- Sodium: 180 mg
- Fat: 0.5 g
- Saturated Fat: 0.1 g
- Unsaturated Fat: 0.3 g
- Trans Fat: 0 g
- Carbohydrates: 28 g
- Fiber: 1.5 g
- Protein: 5 g
- Cholesterol: 0 mg
Keywords: sourdough bread, sandwich bread, homemade bread, artisan bread, sourdough starter, easy sourdough recipe


