
Chocolate Mirror Glaze for a Decadent Chocolate Cake Recipe
Introduction
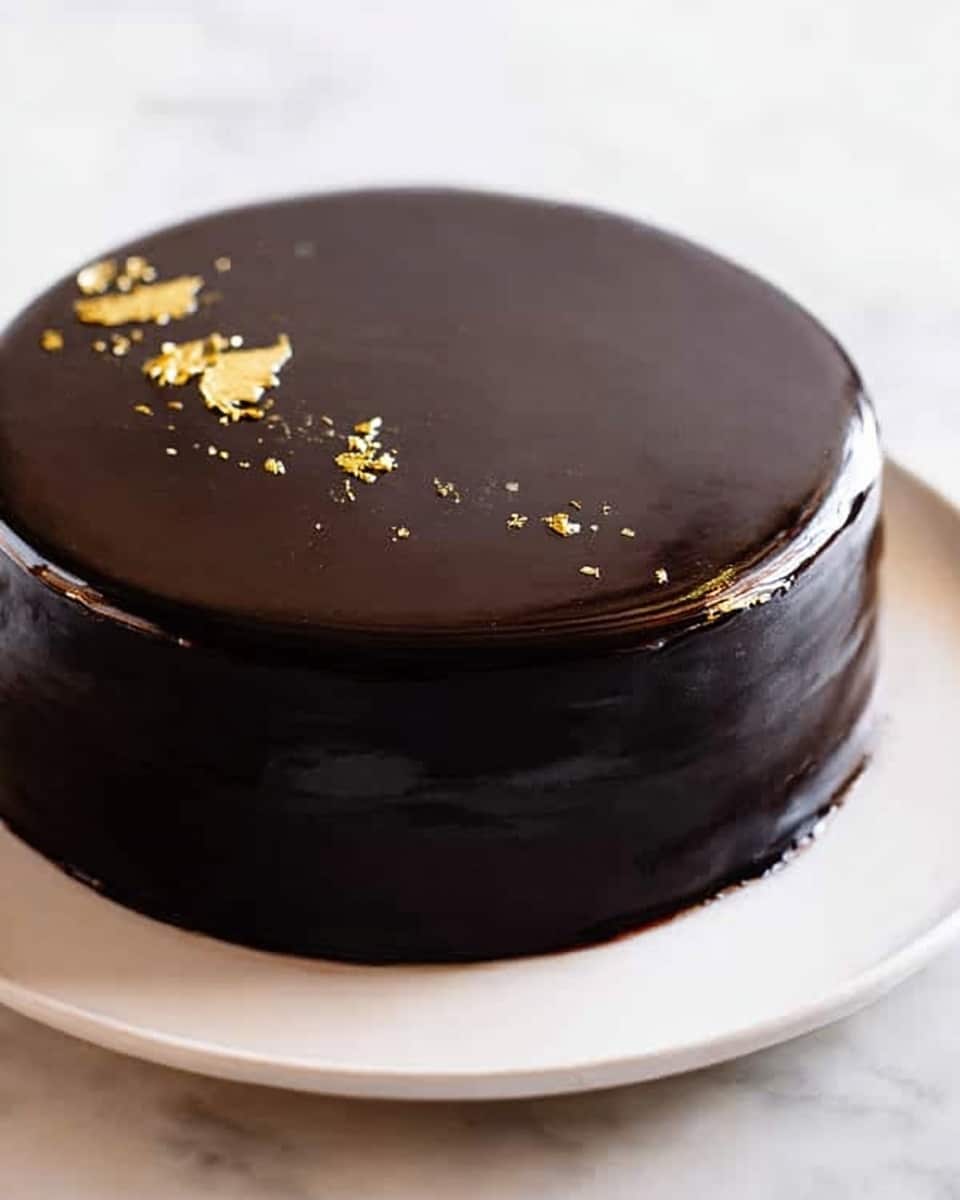
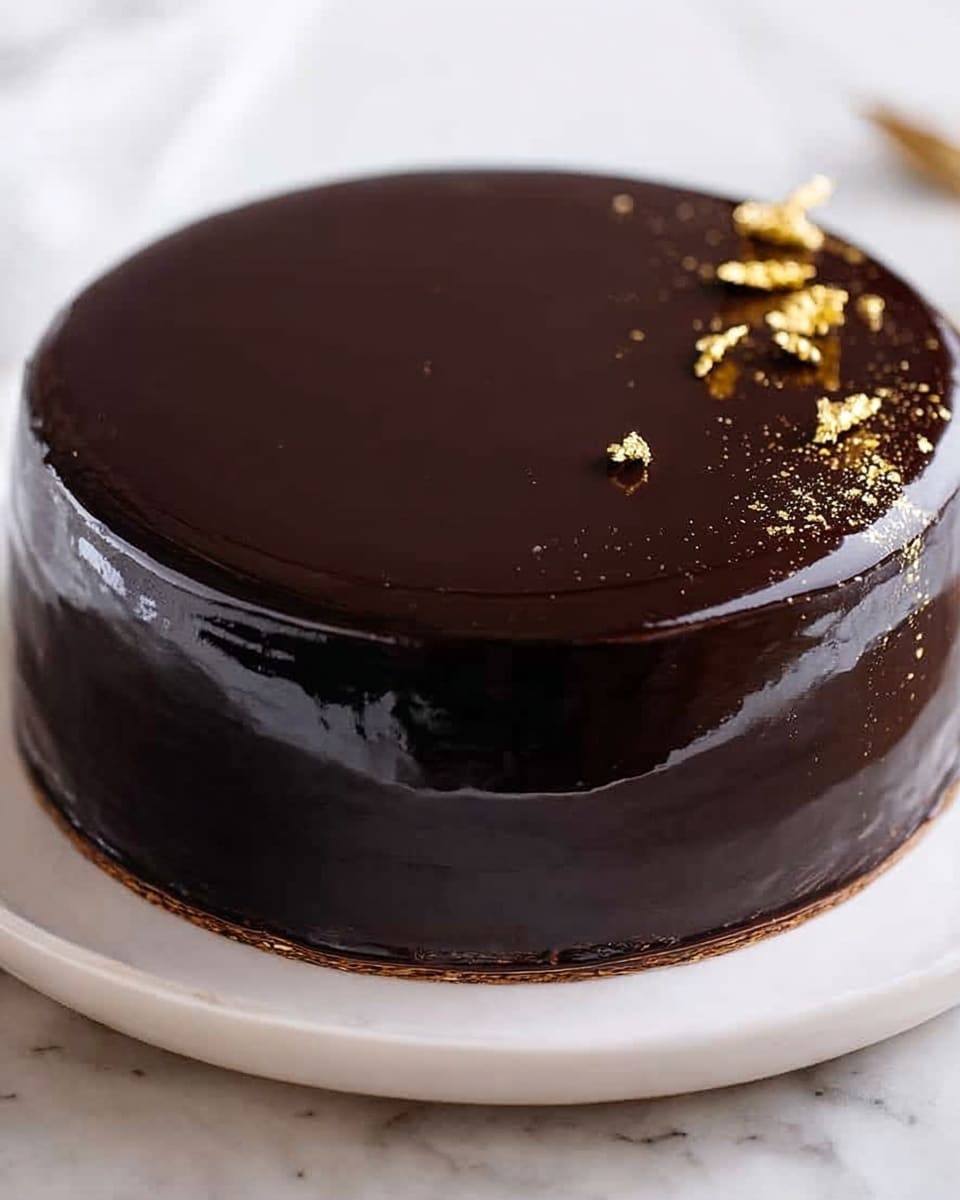
This chocolate mirror glaze cake is a stunning dessert that combines a smooth, shiny glaze with rich, layered chocolate cake inside. Perfect for special occasions, the glossy finish creates an impressive centerpiece that tastes as good as it looks.
Ingredients
- 1 x 20cm / 8″ chocolate cake (2 layers) (see Note 1)
- 2 batches Dark Chocolate Ganache (see Note 2)
- 2 1/2 tbsp cold tap water
- 4 tsp gelatine powder (see Note 3)
- 2/3 cup water
- 2/3 cup cream (pure/regular whipping cream, better than thickened/heavy cream, see Note 4)
- 1 cup unsweetened cocoa powder, sifted (preferably Dutch processed, see Note 5)
- 1 cup + 2 tbsp caster/superfine white sugar (see Note 6)
- Gold dust and gold leaf (optional decorations, see Note 7)
Instructions
- Step 1: Refrigerate the cake layers for at least 1 hour until well chilled to make handling easier. Trim the cake layers to level them and frost the cake smoothly with dark chocolate ganache.
- Step 2: After frosting, refrigerate the cake for at least 1 hour to set the ganache before applying the mirror glaze.
- Step 3: Bloom the gelatine by placing 2 1/2 tbsp cold water in a small bowl, sprinkling the gelatine powder evenly over the surface, and mixing gently so all powder is wet. Let sit for 5 minutes until rubbery.
- Step 4: In a medium saucepan, whisk the cocoa powder and 2/3 cup water until lump-free to form a paste.
- Step 5: Add a splash of cream to the cocoa paste and stir to loosen. Then add the remaining cream and all the sugar, gently mixing without whisking.
- Step 6: Heat the mixture over medium-high heat until it boils, then remove from heat immediately.
- Step 7: Add the bloomed gelatine to the hot glaze and gently stir until fully dissolved and glossy. Some white foam is fine.
- Step 8: Strain the glaze through a fine mesh strainer into a shallow bowl, pouring it carefully to minimize bubbles.
- Step 9: Remove any bubbles by twisting the bowl rapidly to make bubbles gather in the center. Cover the glaze with cling wrap pressed to the surface to prevent skin formation and cool at room temperature for about 2 hours until it reaches 30°C (86°F).
- Step 10: Just before glazing, strain the glaze again into a jug to remove any lumps or bubbles.
- Step 11: Place the chilled cake on a rack over a tray to catch excess glaze.
- Step 12: Pour the glaze over the cake starting at the center, moving in an expanding spiral to coat the top and sides smoothly. Pour in one steady motion for best results.
- Step 13: Quickly pour extra glaze on any uncovered spots on the sides.
- Step 14: Transfer the cake to a platter before the glaze sets (about 10 minutes).
- Step 15: Use excess glaze and a warmed palette knife (heated gently or dipped in warm water) to fill any gaps or smooth out imperfections.
- Step 16: To slice, dip a knife in warm water, wipe dry, and make clean cuts between the layers. Clean and warm the knife between each slice for neat pieces.
Tips & Variations
- Use a regular whipping cream rather than thickened or heavy cream for the best texture in the glaze.
- For an extra elegant finish, decorate with edible gold dust or gold leaf after glazing.
- Pour the glaze from a low height to avoid bubbles forming in the shiny surface.
- If you want to prepare the glaze in advance, it can be refrigerated overnight and gently warmed before use.
Storage
Store the glazed cake in the refrigerator, covered loosely with a cake dome or plastic wrap, for up to 3 days. Let it come to room temperature for about 30 minutes before serving. Reheat slices gently if desired, but avoid microwaving the whole cake to preserve the glaze’s shine.
How to Serve
Serve this delicious recipe with your favorite sides.
FAQs
Can I prepare the mirror glaze a day ahead?
Yes, you can make the mirror glaze in advance. Refrigerate it overnight covered tightly, then gently warm it to about 30°C (86°F) and strain before pouring over the cake.
Why is my mirror glaze not shiny?
Shiny glaze depends on proper gelatin melting and minimal bubbles. Avoid vigorous stirring, strain the glaze well, pour from a low height, and cover it to prevent skin. If bubbles form, twist the bowl to gather them or skim off foam gently.
Print
Chocolate Mirror Glaze for a Decadent Chocolate Cake Recipe
- Total Time: 1 hour 45 minutes
- Yield: One 20cm / 8″ two-layer chocolate cake 1x
Description
This Chocolate Mirror Glaze recipe creates a stunning, glossy finish perfect for elevating any layered chocolate cake. Featuring a smooth, rich glaze made with cocoa, cream, and gelatin, this technique ensures a luxurious shine that drapes beautifully over the cake for a professional patisserie look.
Ingredients
For the Cake
- 1 x 20cm / 8″ chocolate cake (2 layers)
For the Dark Chocolate Ganache
- 2 batches Dark Chocolate Ganache (refer to detailed ganache recipe)
For the Mirror Glaze
- 2 1/2 tbsp water (cold tap water)
- 4 tsp gelatine powder
- 2/3 cup water
- 2/3 cup cream (pure / regular whipping cream; better than thickened or heavy cream)
- 1 cup cocoa powder (unsweetened, sifted, preferably dutch processed)
- 1 cup + 2 tbsp white sugar (caster/superfine)
Optional Decoration
- Gold dust and gold leaf
Instructions
- Cake and Ganache Preparation: Refrigerate the two chocolate cake layers for at least 1 hour until well chilled, which makes them easier to handle. Then level the cakes by trimming off any domed tops. Ice the cake using the dark chocolate ganache, smoothing the surface to achieve a level and even finish. Chill the ganached cake for at least 1 hour to set the frosting before glazing.
- Bloom Gelatine: In a small bowl, place 2 1/2 tablespoons of cold water and sprinkle the gelatin powder evenly over the surface. Stir gently to ensure all gelatin is moistened. Leave it undisturbed for 5 minutes. This process is called blooming and causes the gelatin to swell to a rubbery consistency, preparing it to dissolve smoothly in the glaze.
- Prepare Cocoa Mixture: In a medium saucepan, combine 2/3 cup water and sifted cocoa powder. Mix thoroughly until the mixture forms a smooth paste, free of lumps.
- Add Cream and Sugar: Pour a small splash of cream into the cocoa paste and stir gently to loosen it. Then add the remaining cream and the white sugar. Stir gently and carefully to combine ingredients without whisking, which can introduce air bubbles.
- Heat the Glaze: Place the saucepan on medium-high heat and bring the mixture to a boil. Once boiling, immediately remove from heat to prevent burning or overcooking.
- Dissolve Bloomed Gelatine: Add the bloomed gelatin rubber lump into the hot glaze mixture. Stir gently and continuously until the gelatin fully dissolves and the glaze is smooth and glossy. Some white foam may remain on top, which is normal.
- First Strain: Using a fine mesh strainer positioned just above a shallow bowl, strain the glaze carefully to remove any lumps or undissolved particles. Pour the glaze from a minimal height to prevent introducing bubbles.
- Bubble Removal: To remove bubbles, twist the bowl quickly between your hands to concentrate bubbles in the center. Skim off any remaining bubbles before continuing.
- Cool the Glaze: Cover the surface of the glaze with cling wrap pressed directly onto it to prevent skin formation. Leave the glaze at room temperature on the counter to cool for approximately 2 hours, until it reaches 30°C (86°F). For longer storage, glaze can be refrigerated overnight but must be gently reheated before use.
- Second Strain: Just prior to glazing, strain the cooled glaze once more into a pouring jug, again minimizing the distance to prevent bubbles.
- Prepare Cake for Glazing: Remove the chilled cake from the refrigerator and place it on a wire rack set over a tray to catch excess glaze. This setup allows the glaze to drip off cleanly without making a mess.
- Pour Mirror Glaze: Pour the glaze starting from the center of the cake in a steady, thick spiral motion moving outward. Aim to cover the surface smoothly and let the glaze cascade down the sides forming a curtain-like finish. Try to pour confidently and continuously in one motion for an even coating without drips.
- Touch Up Coating: Check all sides for full glaze coverage. If any spots appear naked, pour a little additional glaze over those areas promptly.
- Transfer Cake: Before the glaze sets (takes about 10 minutes), carefully move the cake from the rack to a serving platter, using a flat spatula or palette knife to support it as needed to avoid damaging the smooth finish.
- Fix Blemishes: Use any leftover glaze from the tray or jug to fill in small gaps or imperfections on the cake surface. Smooth these fixes gently using a palette knife warmed slightly by dipping in hot water or a blowtorch for a professional finish.
- Slice Cake Cleanly: Fill a tall jug with warm water. Dip a sharp knife in the warm water, wipe dry, and make the first cut. Clean the knife, warm it again, dry, and make subsequent cuts. This method produces clean, neat layers and prevents sticking or tearing.
Notes
- Note 1: Use a well-made chocolate cake with tight crumb that holds its shape well for best results.
- Note 2: Prepare smooth, rich dark chocolate ganache to frost the cake layers before glazing.
- Note 3: Gelatine powder is essential for setting the glaze with that perfect mirror finish.
- Note 4: Using regular whipping cream is better than thickened or heavy cream to achieve the right consistency.
- Note 5: Dutch processed cocoa powder yields a deeper color and smoother glaze.
- Note 6: Caster or superfine sugar dissolves faster ensuring a smooth glaze texture.
- Note 7: Avoid vigorous mixing or whisking to prevent bubbles forming in the glaze.
- Note 8: If bubbles persist, skim them off or wait for them to pop before straining again.
- Note 9: For overnight glaze storage, cover tightly and refrigerate, then gently warm before pouring. For cake handling, use a large cake lifter or flat board for perfect transfer without damage.
- Prep Time: 1 hour 30 minutes
- Cook Time: 15 minutes
- Category: Dessert
- Method: Stovetop
- Cuisine: Western
Keywords: Chocolate Mirror Glaze, Chocolate Cake, Cake Decorating, Cake Glaze, Mirror Glaze, Chocolate Ganache, Baking, Dessert